Rainbow Riders - Frisbii Subscriptions for WooCommerce
This Third Party Plugin for WordPress makes it possible to use Frisbii with your WooCommerce and sell your subscription products, without the need for any other plugins (e.g. WooCommerce Subscriptions).
Our partner Rainbow Riders created a plugin to connect WooCommerce shop and our application.
.png)
Note
At the moment, there is no other WooCommerce plugin that works with Frisbii on the market.
Introduction
WooCommerce is an open-source e-commerce plugin for WordPress. It is designed for small to large-sized online merchants using WordPress.
Sell subscription products
Sell one or more subscription products by simply connecting a WooCommerce product to a Frisbii Subscription Management Lite plan.
Mix up subscriptions and single products
Our plugin also supports orders that contain a mix of subscription products and single products.
Shipping costs and discounts support
Any shipping costs or discounts in the WooCommerce order can be applied to the Frisbii Subscription Management Lite of your customer.
Automatic recurring orders
If needed, our plugin can track newly settled invoices in your Frisbii account and automatically create corresponding orders in WooCommerce for you to process (e.g. ship items).
Functionalities
Installing the plugin and configuring is a simple process which the partner will help you with.
Get a license key and the installation files
Contact us so that we can send you your license key and the plugin files you need to install on your WordPress website.
Install and create products
Install the plugin and create products using the new product type called Subscription product.
Map your products
For each newly created product choose which Frisbii Subscription Management Lite plan corresponds to it.
Discounts
Set up the discounts you want to offer both in your Frisbii account and WooCommerce shop and map them.
Custom development
In some cases, you might already be using some subscription setup in your webshop in which case you might need data transformation, but we can help with that as needed.
Additionally, you might be using 3rd party plugins (e.g. enabling additional properties on your products) in which case we will need to add compatibility for that in our plugin.
If you are interested, you can visit our partner's website: Rainbow Riders.
Setup WooCommerce plugin
This article is a guide on how to install and configure the WooCommerce plugin.
Installation & Configuration
See this video and follow the steps below :
Install the plugin to your Wordpress admin.
Click on Active Plugin.
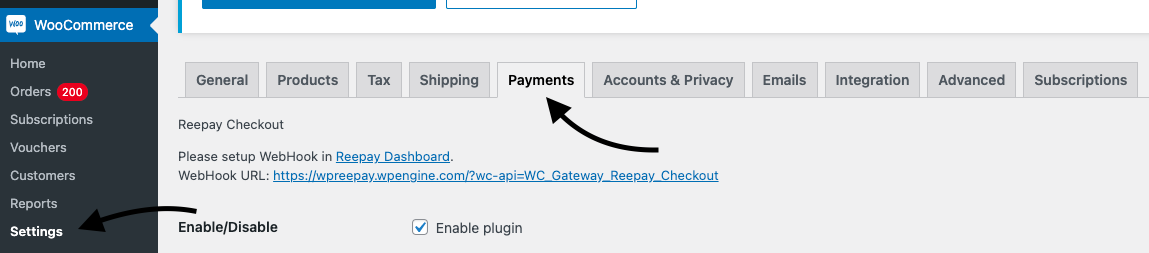
Go to WooCommerce → Settings → Payments → Frisbii Checkout.
Choose a title and description to be shown on the checkout page.
For example:
Title: Online Payment
Description: Secure payment with Frisbii.
Insert your API keys.
The Live API key is used for real payments
The Test API key is only used for test payments.
Insert your Private API key from your live Frisbii account into the Live API key field.
Note
You can find your private API keys in your Frisbii Dashboard.
Insert your Private API key from your test Frisbii account into the Test API key field.
Open a new tab and go to your live account.
On the side bar, click on Developers → API credentials.
Click on Generate New under Private API Keys.
Copy the key and paste it in WooCommerce under Private key.
Choose between modal and window display.
Choose the Payment methods you also have activated in Frisbii.
Hold ctrl/cmd while clicking on the different payment methods.
This will list all the activated payment methods together in the Frisbii payment window.
Note
You also have the option to create individual payment options in the WooCommerce checkout, by going to WooCommerce > Settings > Payments and activating the different payment methods. E.g. Frisbii - MobilePay.
In this case, you can have individual rows directly in the WooCommerce checkout.
For example:
Frisbii Checkout. Title: Payment Cards
Frisbii MobilePay. Title: MobilePay Online
Frisbii ApplePay. Title: Apple Pay
Chose which settle option you would like to use.
For further information please read: Configure automatic settle in Wordpress/WooCommerce
Enable debug, for faster solutions if anything goes wrong.
Enable Save CC to save credit cards to customers for their later use. If you are not approved by your acquirer to save cards, do not activate this option.
Enable Payment method icons for the same payment methods you enable in step 7.
Choose order status mapping between WooCommerce and Frisbii. Recommended configuration:
Frisbii Created = Pending payment
Frisbii Authorized = Processing
Frisbii Settled = Completed.
Click Save changes.
Bonus: Show your logo in the payment window
In order to do so, please follow these steps:
Go into your Frisbii Billing Administration.
Click on Configuration → Checkout.
In the default Configuration, click on Edit.
Scroll down and Upload a logo from your computer → Update Configuration.
Caution
If you have installed a security plugin ensure not to block Ireland as a country or just whitelist our webhook IP address: 52.18.114.235. This is very important since the plugin relies on webhooks.
Automatic settle in Wordpress / WooCommerce
This is a specific guide on how to configure automatic settle in our Wordpress / WooCommerce plugin.
By default, WooCommerce orders processed by the Frisbii payment method are not settled automatically, but manually.
However you can configure the plugin, to settle your orders automatically by following these steps:
Go to WooCommerce → Settings → Payments → Frisbii Checkout.
Caution
Please be aware that settling orders before shipping them, is not allowed in certain countries.
In the settings of the Frisbii Checkout payment method, you will see a box stating the three scenarios: online/virtual, physical, and recurring (subscription).

If you choose:
Instant settle of online/virtual products: the summarized amount from all the online/virtual WooCommerce products in the cart is automatically settled.
Instant settle of physical products: the summarized amount from all the physical WooCommerce products in the cart is automatically settled.
Instant settle of recurring (subscription) products: the recurring(subscription) amount from all the physical WooCommerce products in the cart is automatically settled.
Note
However recurring (subscription) products is by default either a physical or online/virtual product.
When configuring instant settle of recurring (subscription) products then both physical-recurring (subscription) products and online/virtual-recurring (subscription) products is automatically settled.
Well done! You now know how to configure automatic settle in Wordpress / WooCommerce.
Frisbii Subscription for WooCommerce
This guide shows you how to configure Frisbii Billing for WooCommerce.
Note
Frisbii Pay and Frisbii Billing are two parts of the former Reepay application. The application was not renamed everywhere yet, so you might still find functionalities with the old name as shown in this article.
Please watch these tutorials:
Frisbii Billing: Subscription Plugin for WooCommerce (Walkthrough)
Frisbii Billing: Subscription Plugin for WooCommerce: How to import customers
Setup and configuration
Please ensure first that you have Billing Checkout for WooCommerce installed.

Find the Billing Subscription for WooCommerce plugin in WordPress Plugin Directory, install it, and activate it.
Note
The logo and text might have changed.

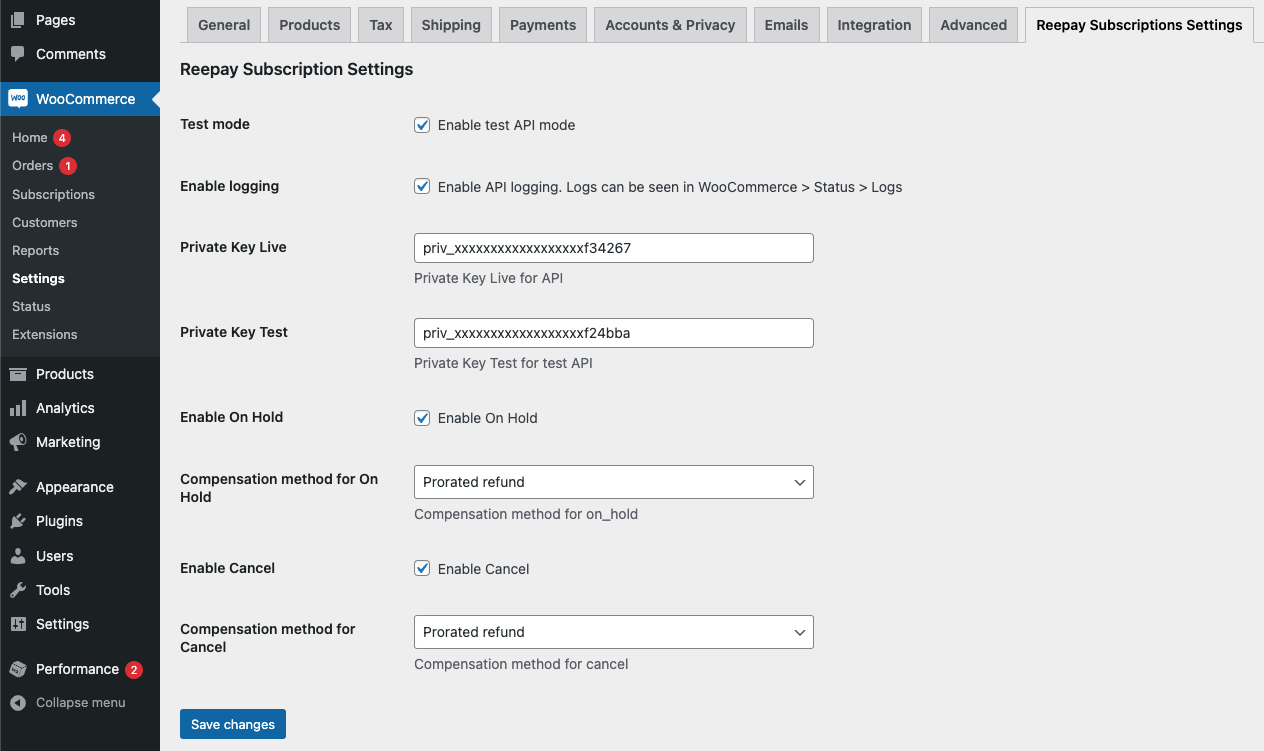
Once activated, you need to head over to WooCommerce → Settings → Billing Subscription Settings. Here you need to paste in your private keys, which have to be the same key, as you have used for Frisbii Checkout. Please also enable test API mode, to use your test private key from your test Frisbii account.
Caution
Private keys have to be the same keys as those used for Billing Checkout!
Create product and plan
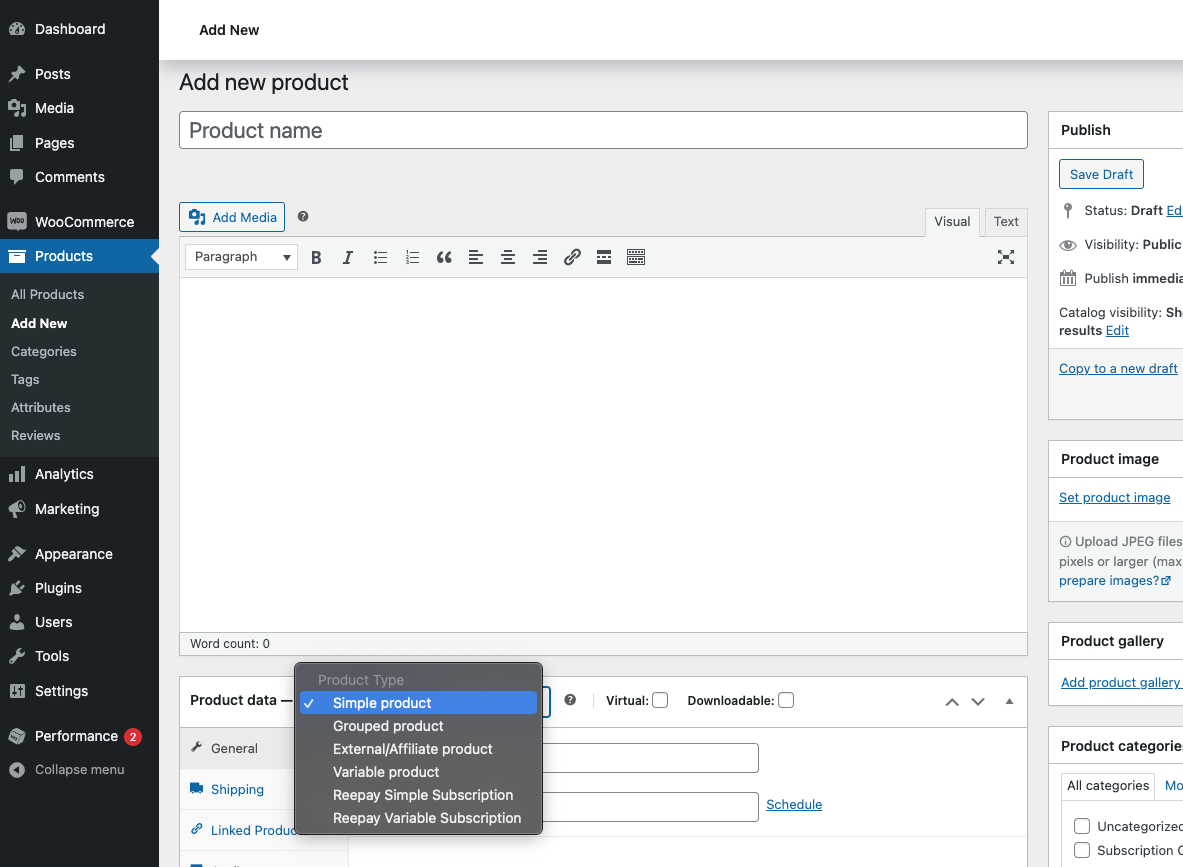
Now you can head over to Products and click on Add new product. In the Product data section, you can choose between :
Billing Simple Subscription and
Billing Variable Subscription.
Both versions are built upon the normal WooCommerce logic about Simple and Variable products.
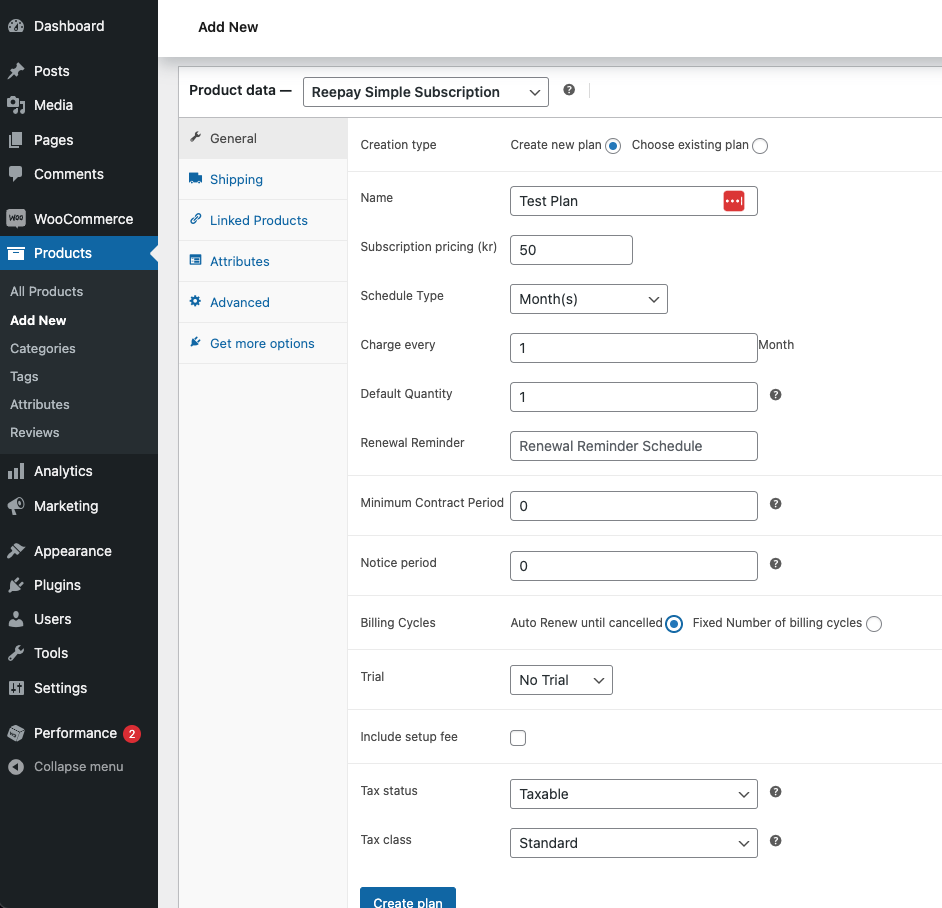
Billing Simple Subscription
For Billing Simple Subscription you have these options:
Either you can create a new plan.
or you can reuse an existing plan.
Note
Plans can also be created and managed in the Frisbii Admin.
If you are just testing, you can use the same values as in the screenshot below. Remember to click on Create plan at the bottom.
Now your plan is created and attached to your WooCommerce product. To verify this, you should be able to see the plan now as chosen under Choose existing plan. Here you have also the option to update the plan, but notice the Supersede Mode section.

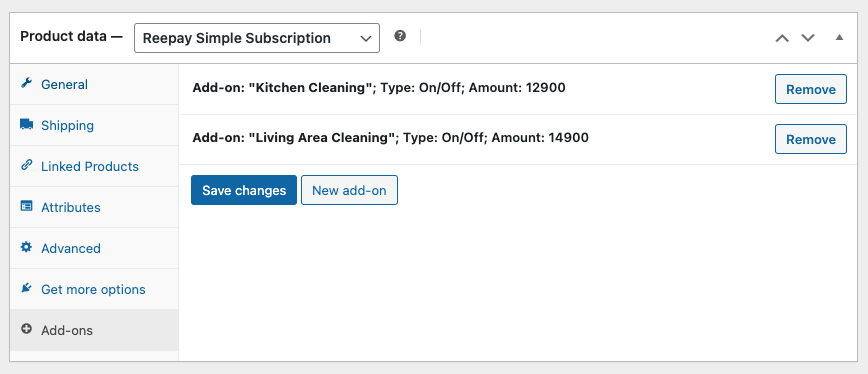
If you want to attach some Add-ons to the plan, you can click on the Add-ons section and click New add-on. Here you will see a similar view, where you can either Create new add-on or Choose existing add-on.
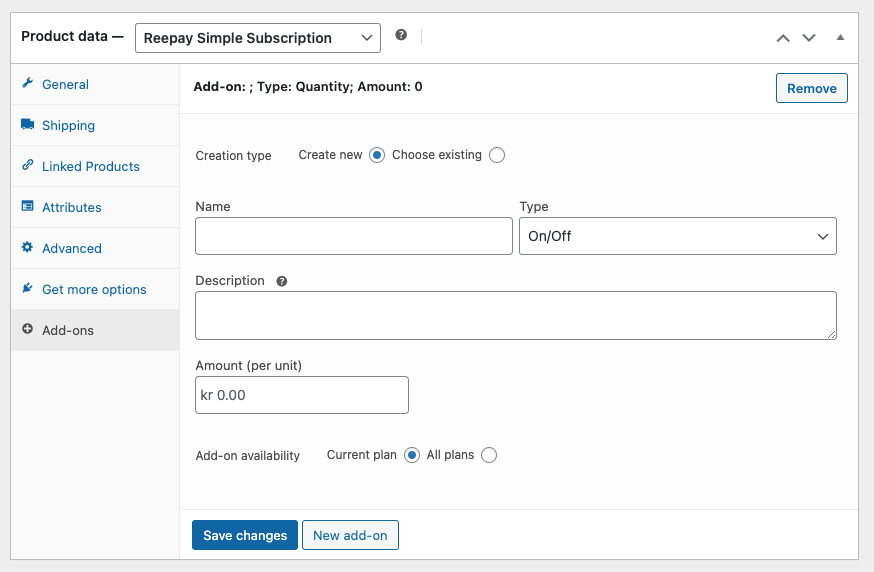
After you have created a couple of add-ons you will see something like this. Remember to save.
Billing Variable Subscription
If you would like to create an Billing Variable Subscription instead, you will see something like this after heading to the Variations section:
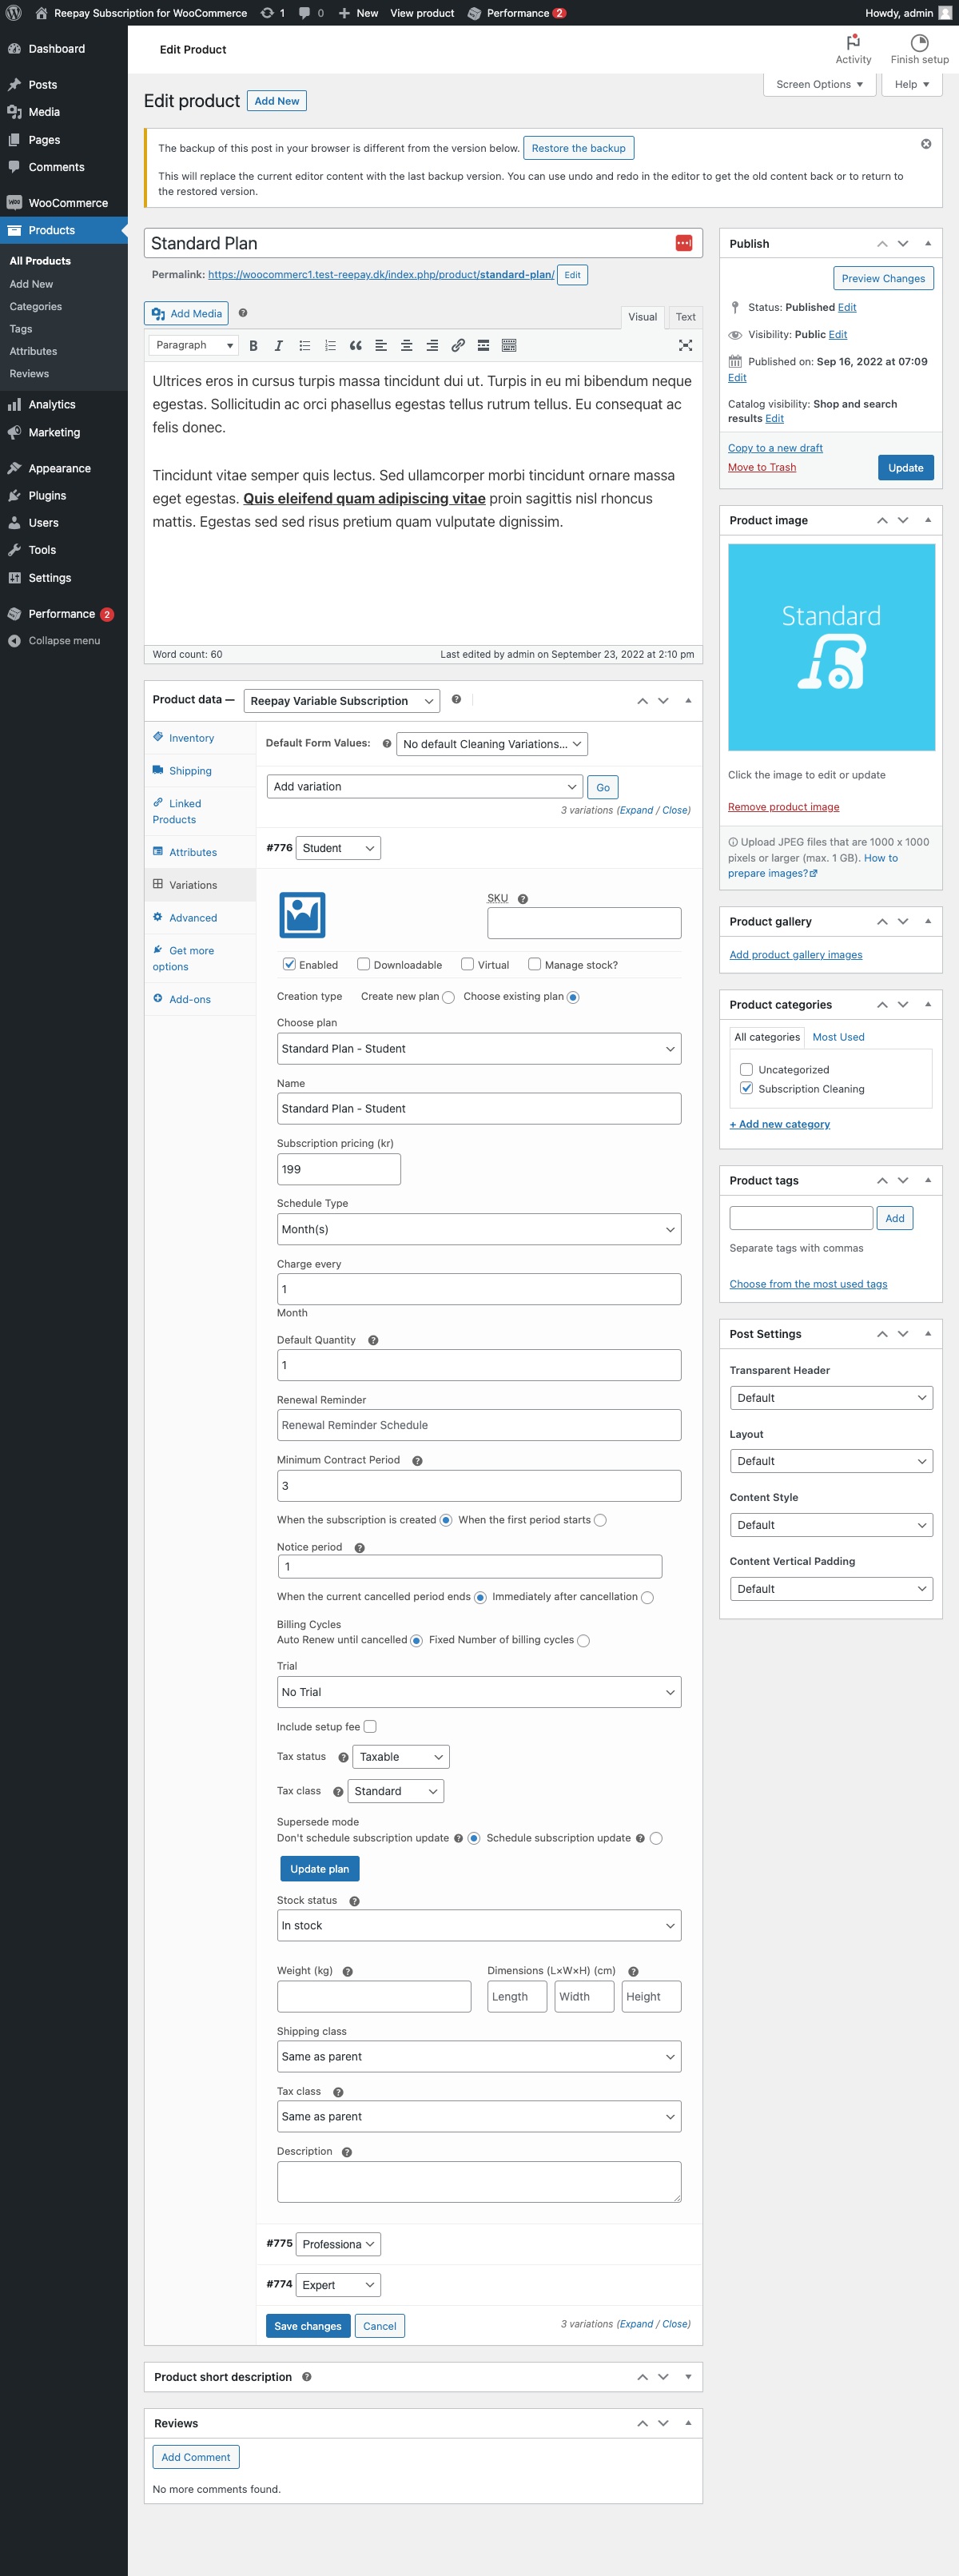
Same principle as before: Either Create new plan or Choose existing plan.
Subscription-based shipping
If you are selling box subscriptions and need to charge your customer for shipping at each renewal, you can configure add-on-based shipping.
Simply go to WooCommerce → Settings → Shipping.
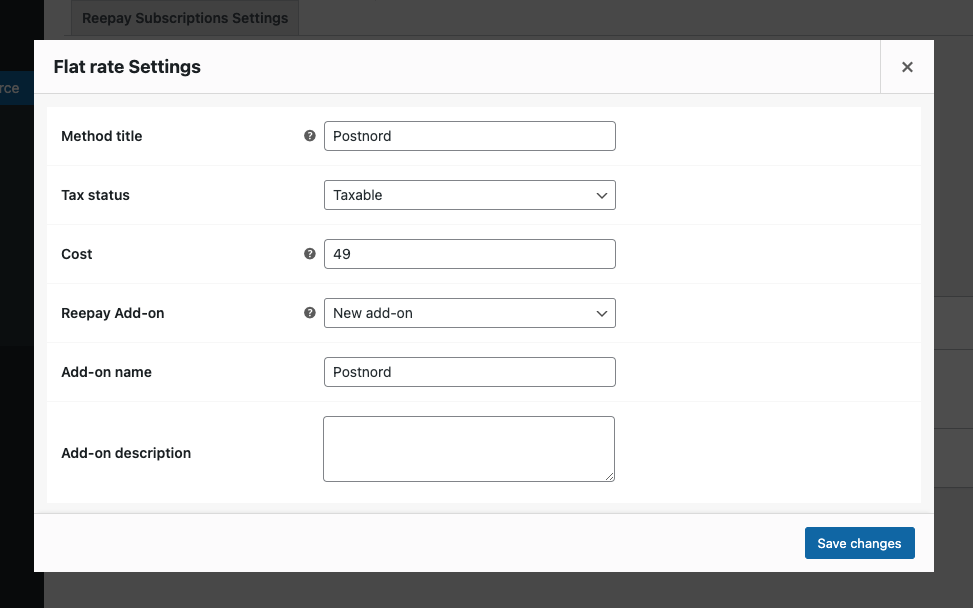
Click one of your zones → Add flat rate shipping method.
Then create a new add-on or choose the add-on you would like to use in the Billing Add-on section.
Note
If you create a new add-on, the amount would be whatever you have typed into the cost field.
Coupons and Discounts
In WooCommerce go to Marketing → Coupons.
Add a coupon.
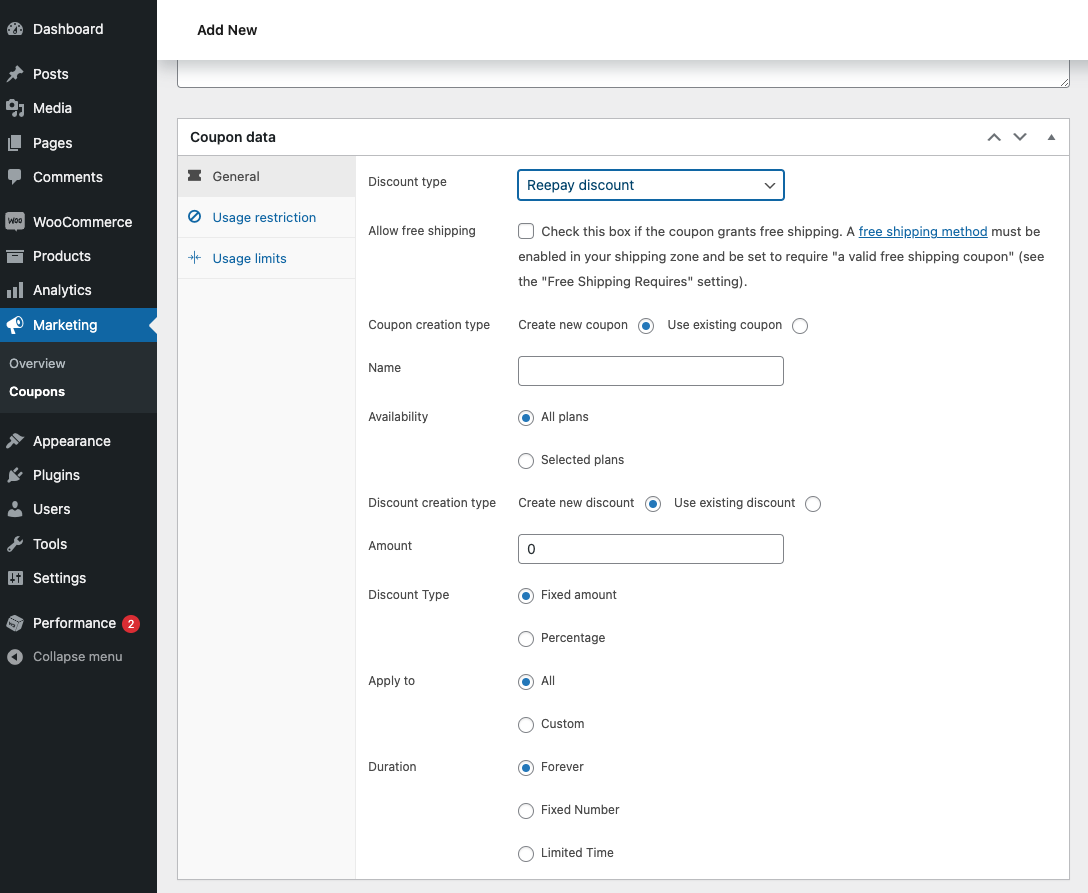
You will have the option to choose Billing in Discount type.
Choose between Create new coupon or Use existing coupon.
You can give the coupon a name and choose which plan it should be valid for.
If you choose Create new discount you will have to , whether it should be a fixed amount or percentage, what the discount should apply to, and the duration
specify the amount,
decide, whether it should be a fixed amount or percentage,
select, on what the discount should be applied to,
and set the duration.
E.g. Fixed Number = 3 will give the customer a discount for the next 3 upcoming payments.
Purchase
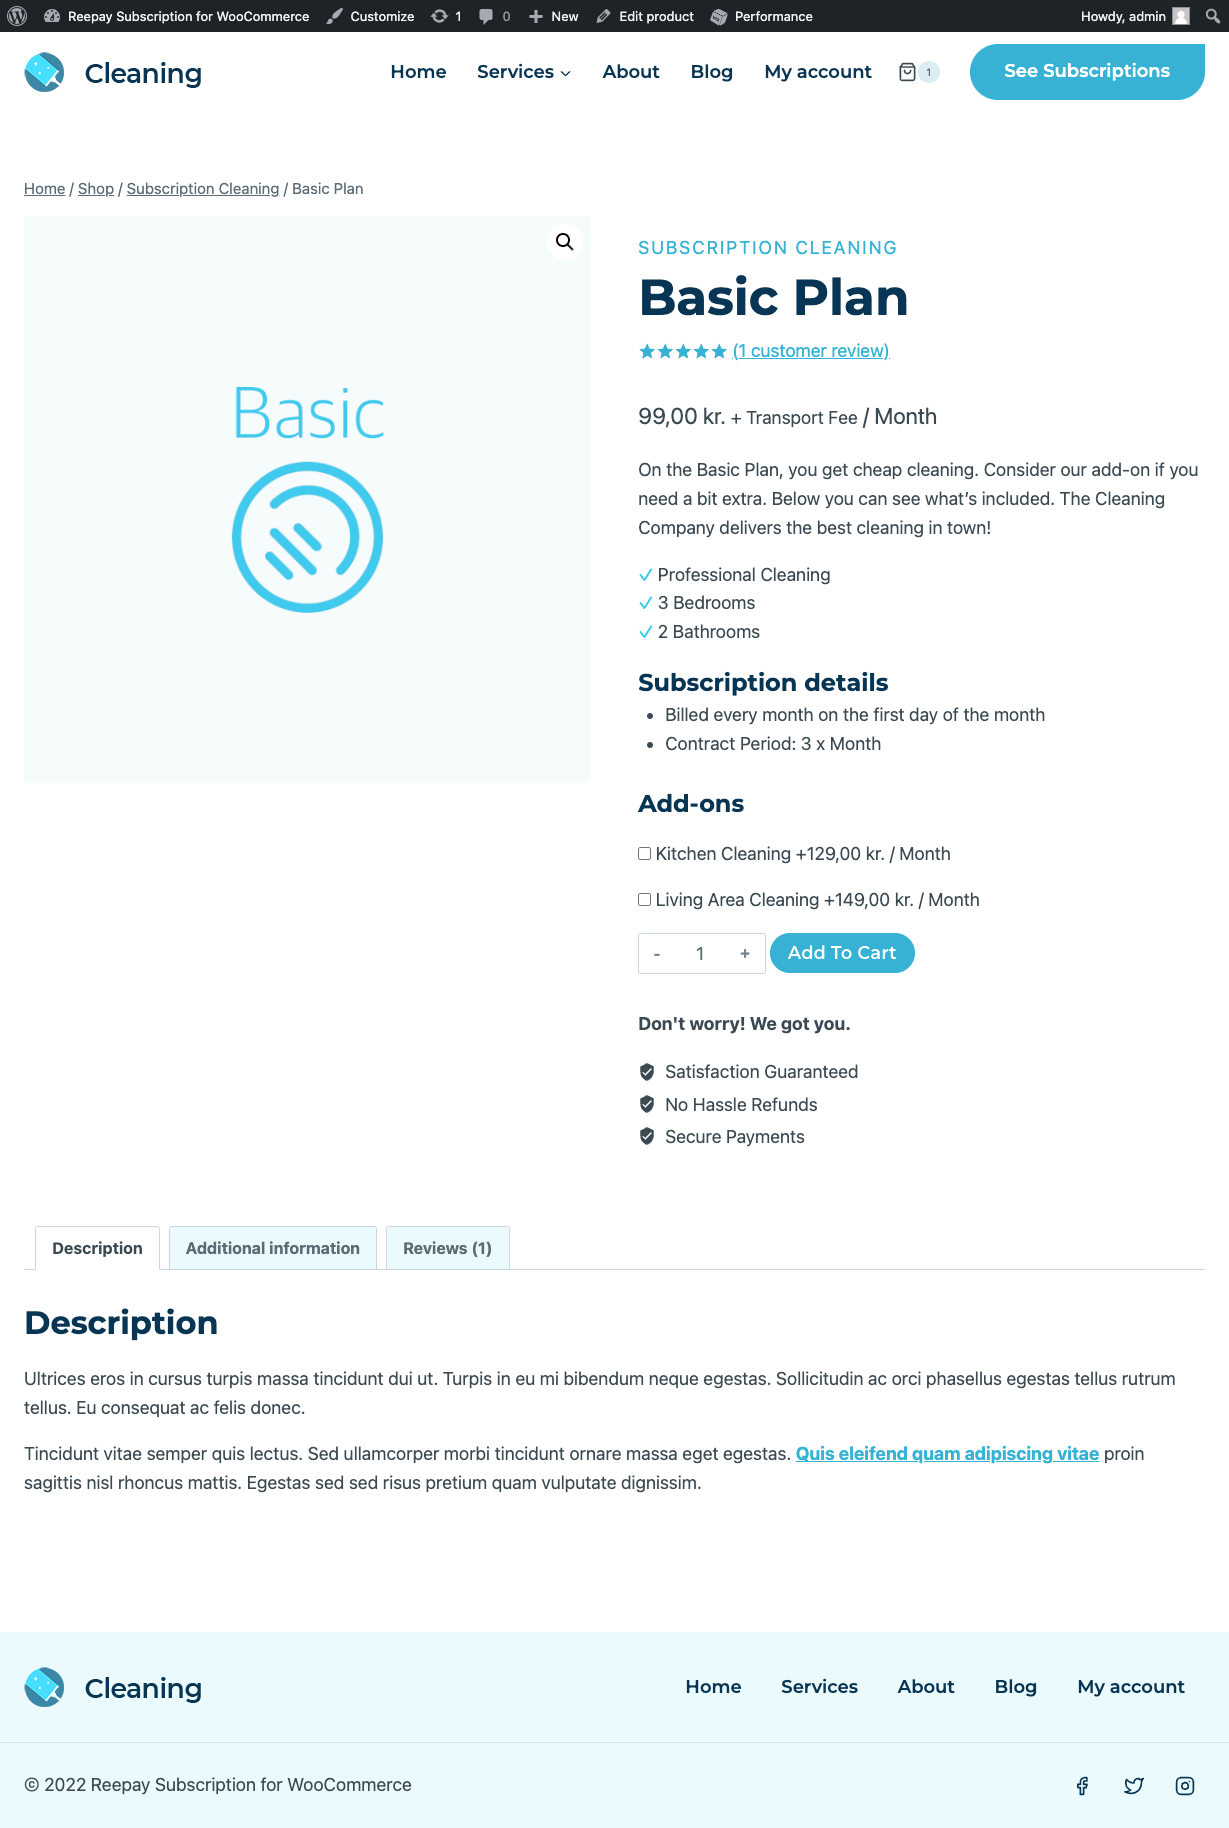
Now navigate to the product you created.
Here you can see the price and the duration. In this case 99,00 kr. / Month.
Also, you can see some additional plan information under Subscription details.
Lastly for this product, the customer has the option to select the add-ons you created.
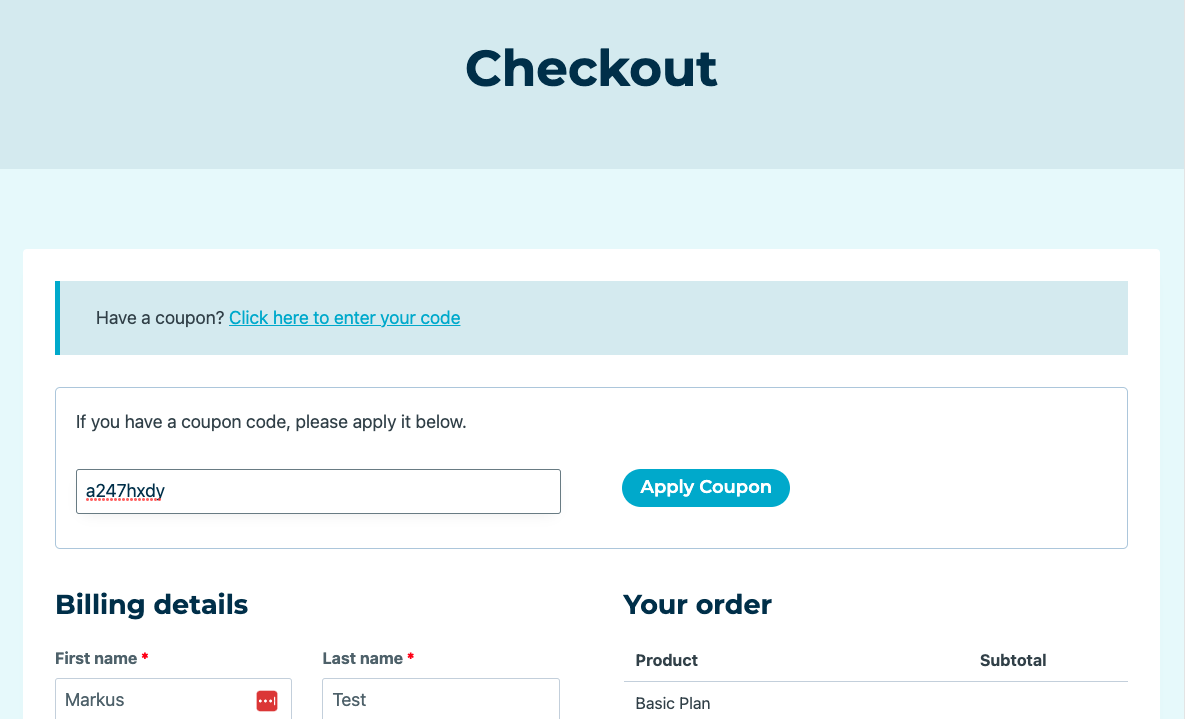
Once you have added the product to the basket, you can also try to apply a coupon if you have made a coupon that works for this plan.
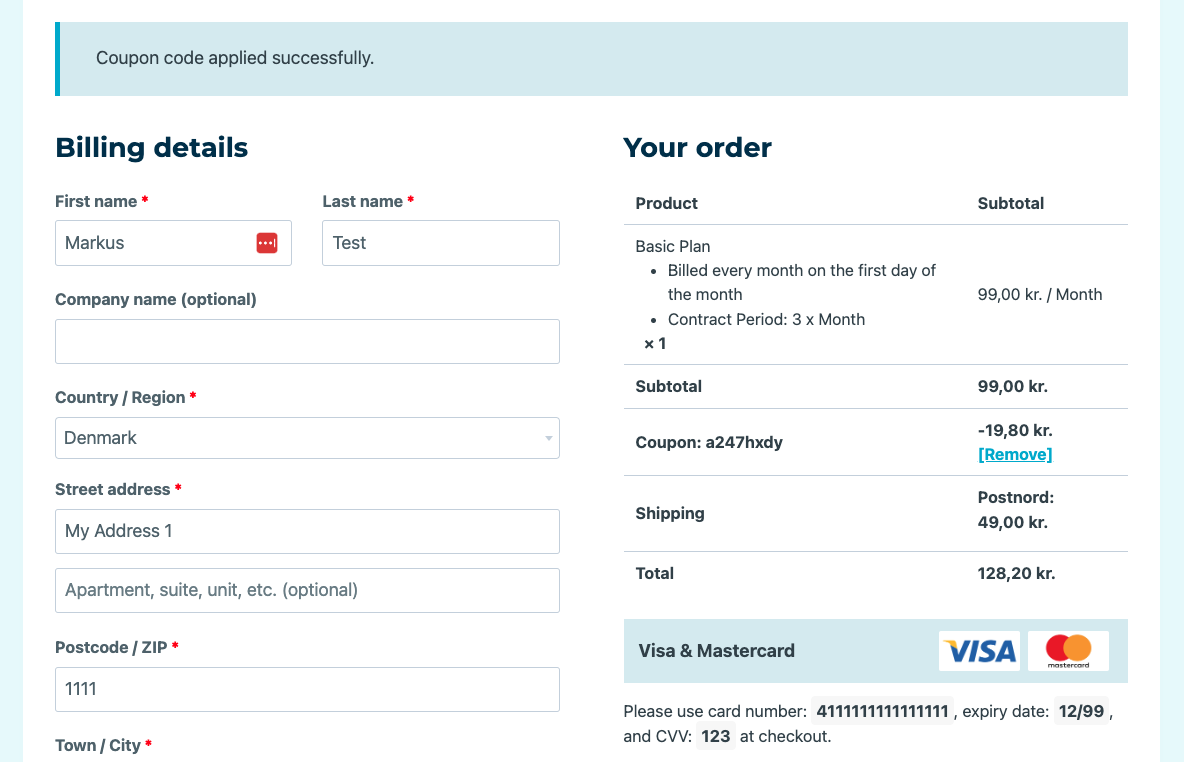
Once the discount has been applied it will be visible in the order summary.
Orders and subscriptions
When the order is paid, you will be able to find the order under WooCommerce → Orders.
What you see below is the parent order, the subscription is based on.
The actual charges for the subscription will exist as sub orders. Click the Show history button to see sub orders.

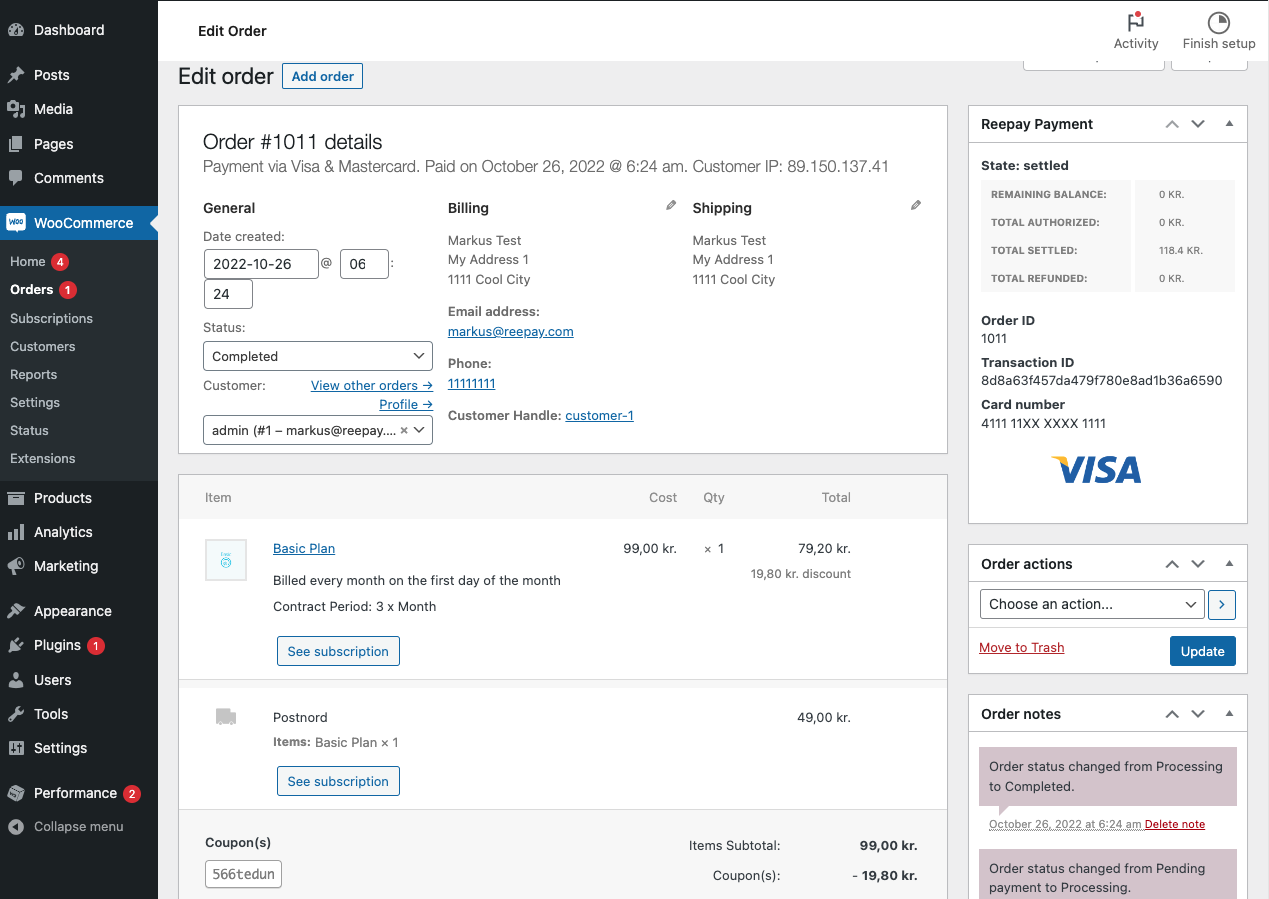
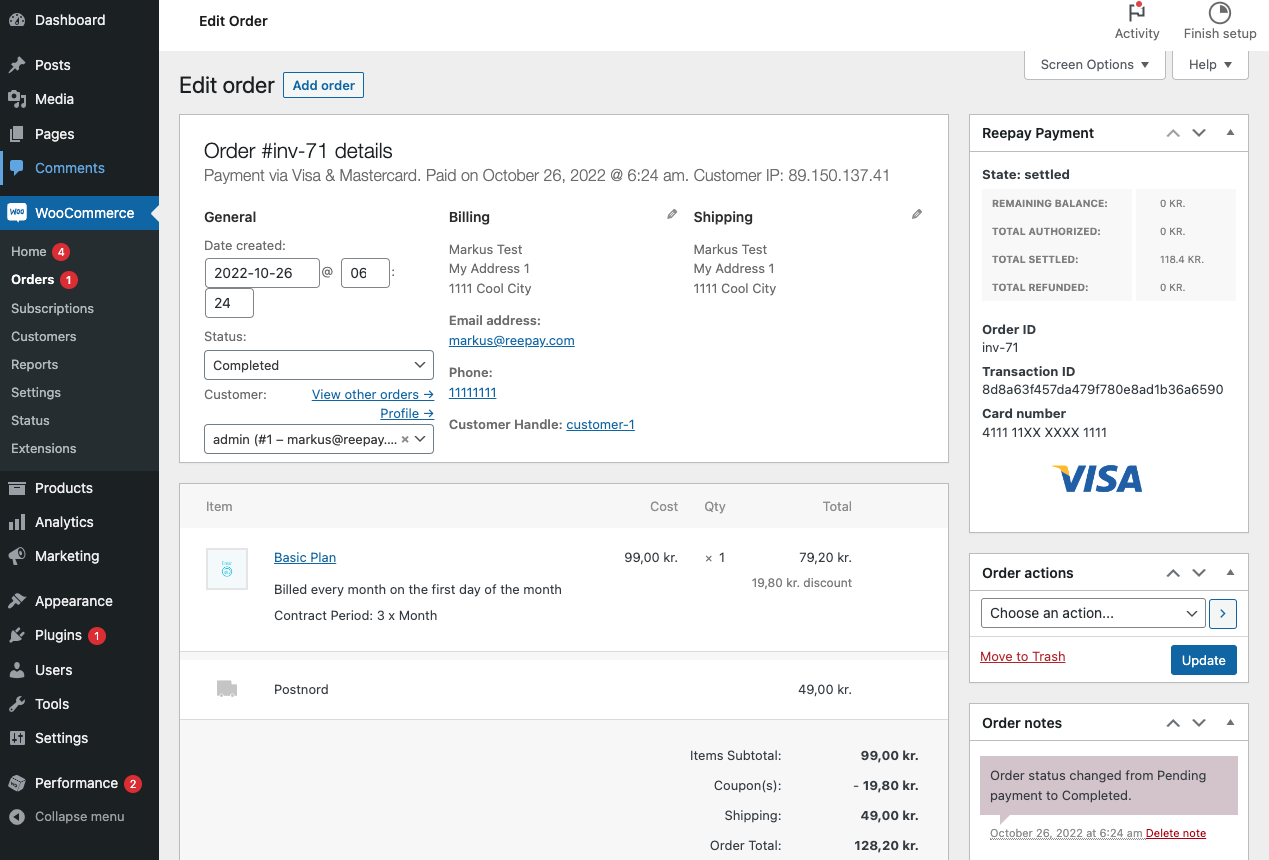
If you click into the parent order, you will see the different products.
You can use the See subscription buttons to quickly jump to Frisbii Admin.
The same goes for the Customer Handle link under the Billing section.
If you click on the See subscription button you will go directly to the subscription in Frisbii, where you can manage it. In the Invoice List you can see INV-71 which also exist in WooCommerce as a sub order to the parent order.

Here can you see the sub order in WooCommerce:
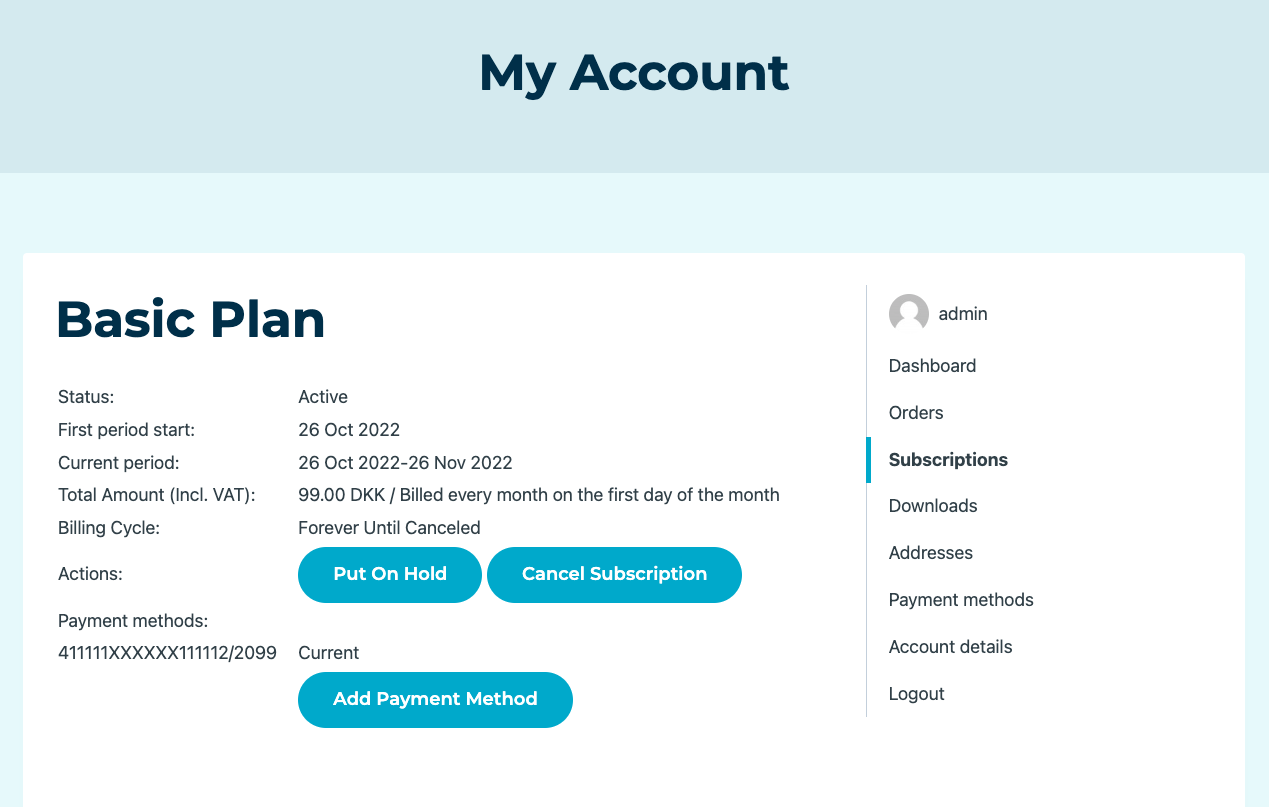
Customers Self Service
You customers are able to manage their subscription under My Account if you have enabled this in WooCommerce.
Under the Billing Settings in WooCommerce, you can enable or disable the options to Put On Hold and Cancel Subscription.
The option to Add Payment Method is there by default.
Capture payments from WooCommerce
This article shows you how to make a full or partial capture in WooCommerce.
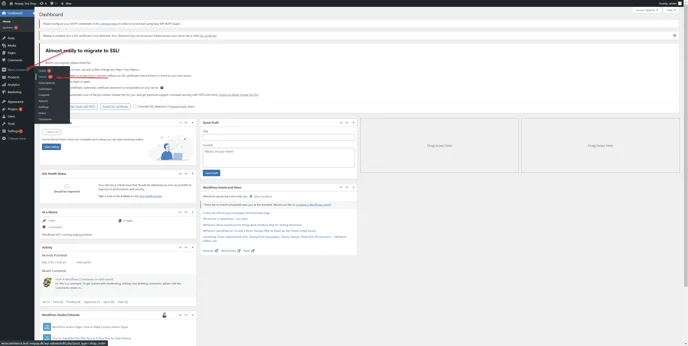
Login to your WooCommerce.
Click on the WooCommerce button.
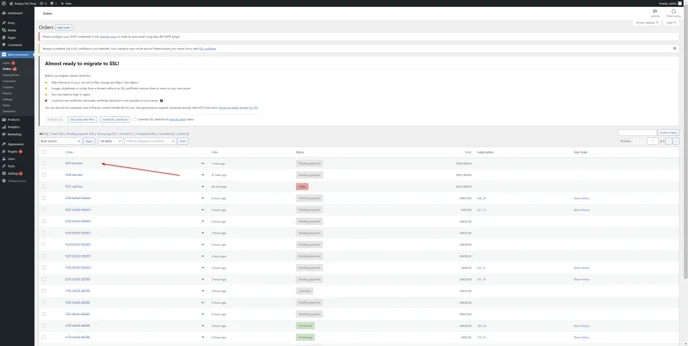
Then click on Orders.
You are now in the order section. Here you can see all the orders your customers have made, select the order you want to full or partial captured.
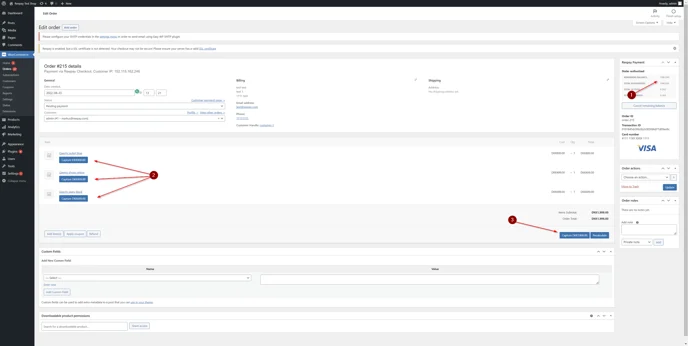
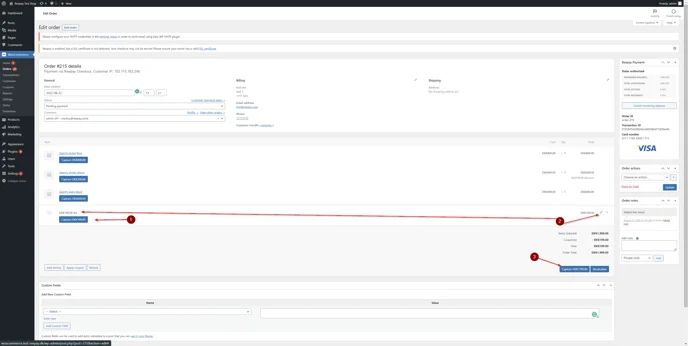
In this interface you get an overview of the order:
The maximum amount you can capture.
The order lines, you can click on the blue button to capture the amount for the specific order line (partially capture).
Click here to capture the whole amount of the order.
If you only would like to capture some of the amounts from a specific order line: Hover over the line.
Example: You sell a set containing a shirt and pants as part of the order. At the moment, you can only deliver the pants, not the shirt. So you split the order and send the pants right now.
A pencil will appear and you can click on it.
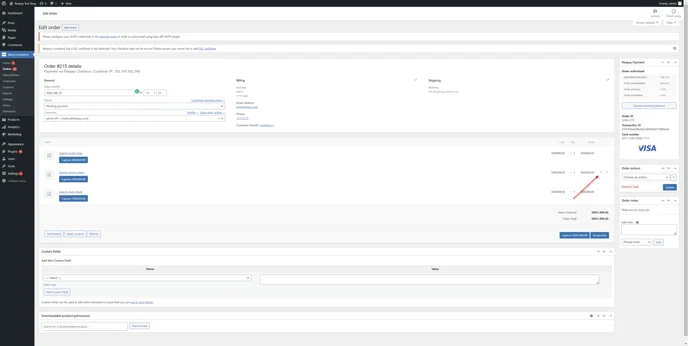
Change the amount and click on Save.
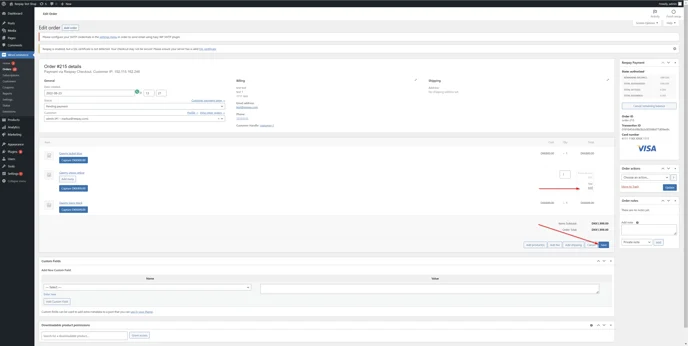
You can now either:
Capture the new amount.
Capture the whole order (with the new changed price).
Cancel the rest of the total possible amount to capture.
Caution
We suggest, not to do so, if you would like to capture the rest of the amount later.
Add a new order line later, when you are ready to send the rest of the order.
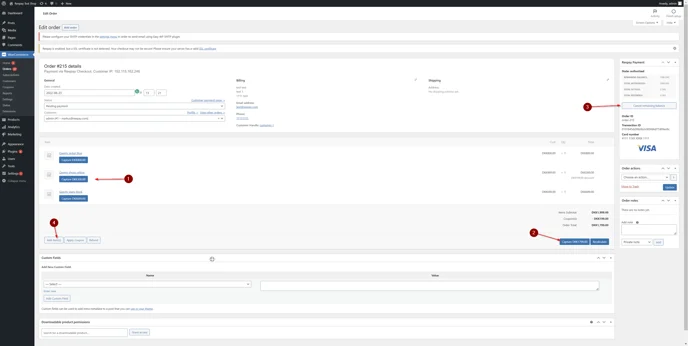
Click on
Add fee if you just want to add a fee and add a text to the new order line.
Add product if you have a specific product made, that matches what you want written in the order line.

The new order line will now appear and you can now. You have the choice to:
Capture the specific amount.
Change the wording of the order line.
Capture the amount for the order.
Note
The new order line needs to be captured separately.
Payment status configuration in WooCommerce
Note
Frisbii Pay and Frisbii Billing are two parts of the former Reepay application. The application was not renamed everywhere yet, so you might still find functionalities with the old name as shown in this article.
By default, WooCommerce orders processed by the Billing payment method are not settled automatically, but manually. However, you can configure the Reepay plugin, to settle your orders automatically when the order enters a specific state.
Caution
Be aware that settling orders before shipping them, is not allowed in certain countries.
Log into your Wordpress/WooCommerce admin.
Navigate to Settings.
Then click on Payments.
Then scroll to the bottom where you have status options highlighted in the box below:
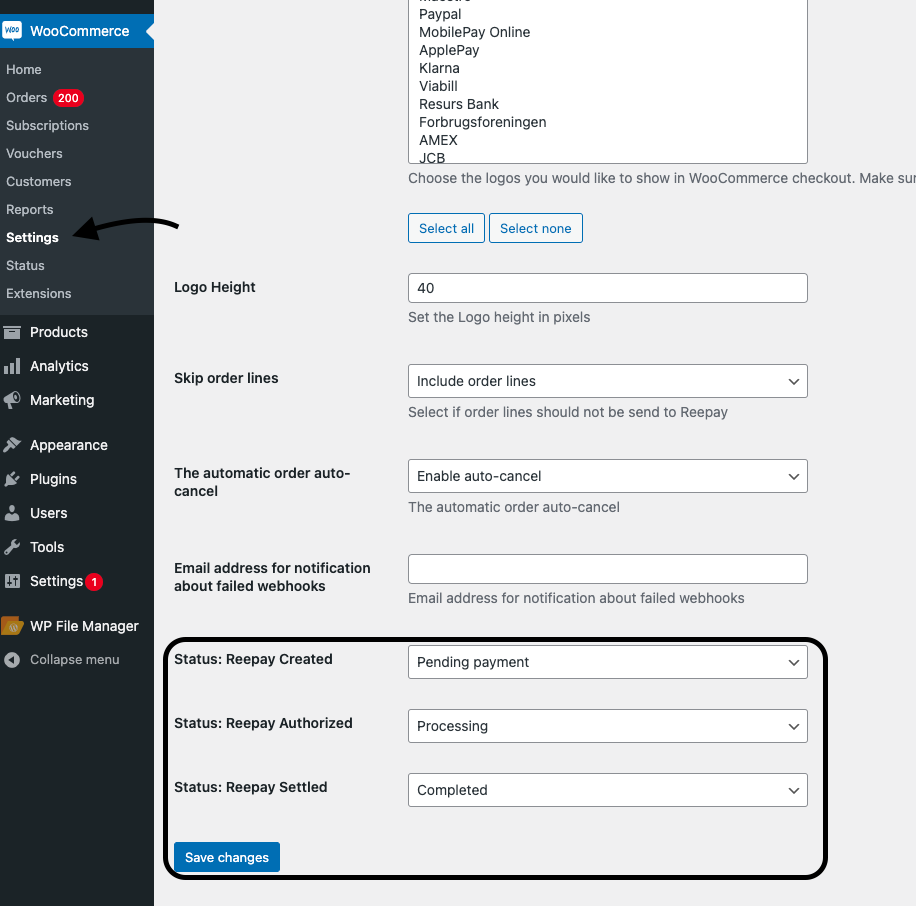
Important
This setup in WooCommerce will settle automatically the invoice in Frisbii, when an order in WooCommerce is set to the status: Completed.